Saturday, December 10, 2011

Jack is Cooking Blueberry Almond Tarte

Well Hello Internet!

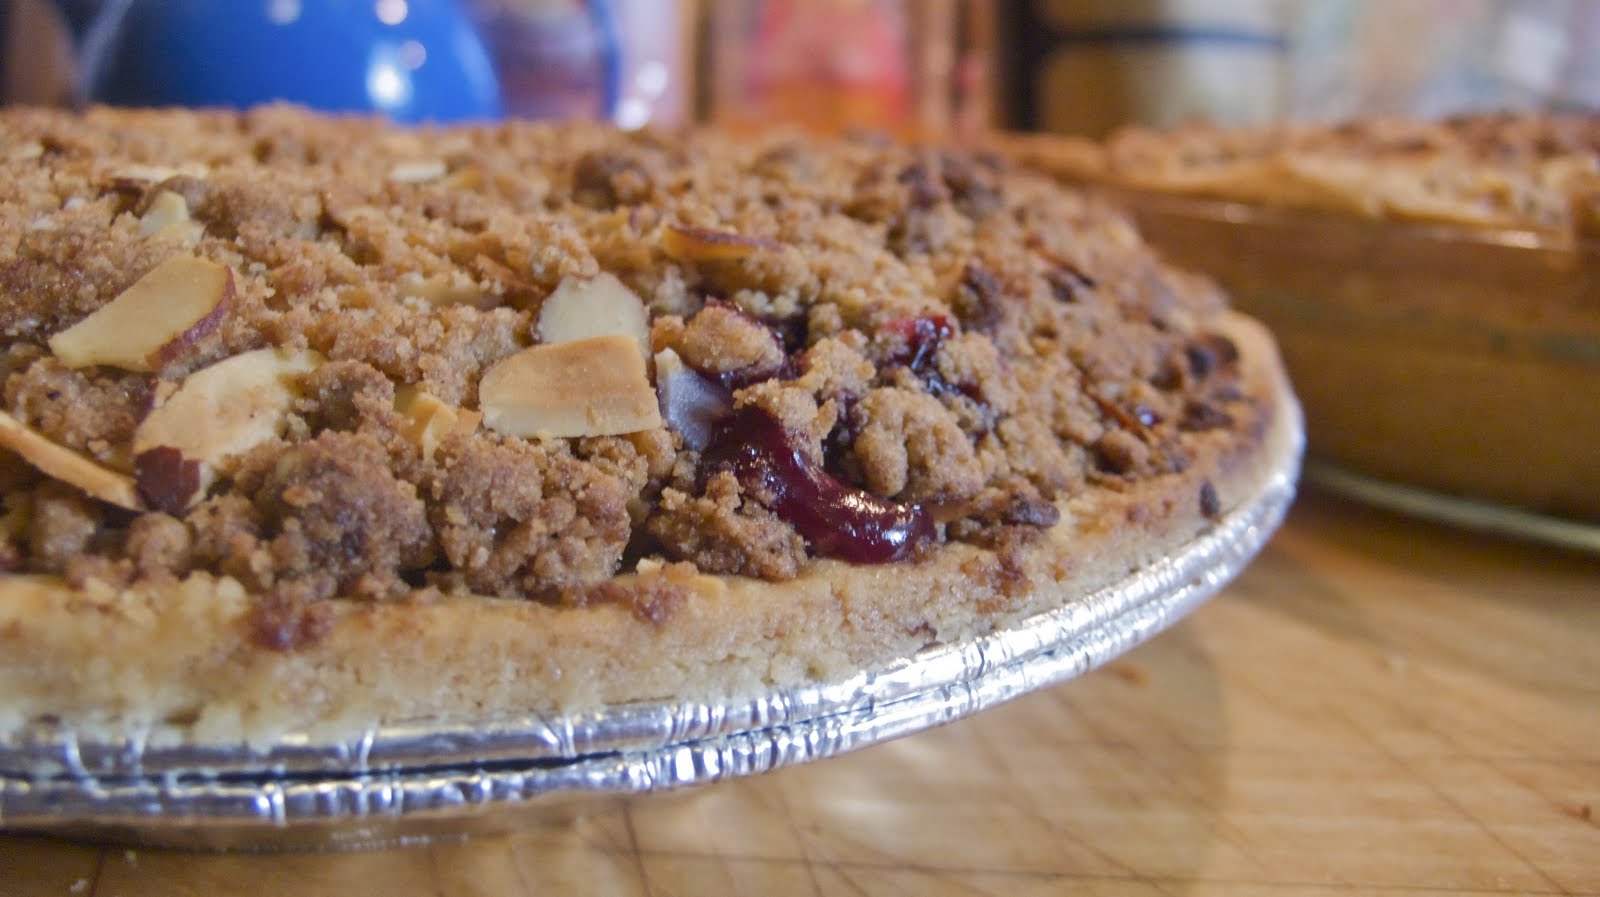
I made a delicious blueberry almond tarte for thanksgiving this year.  I felt there needed to be something besides pumpkin and pecan pie.  So i made this delicious creation instead.  

It is very simple to make. There are basically only two elements that need making, and that is the crust, and the Crème d'Amandes.

you will also need:

Blueberries (1 pint)
Almond Slivers
a 9 inch tarte ring

You can use any crust you like pre made or otherwise, but i like to make a hazelnut crust, which is excellent for any sweet crust.

Here is my recipe for hazelnut crust (this will make about three 9 inch tarts) 

125 grams powdered sugar
250 grams butter
3 eggs (room temperature)
300 grams flour + a little extra
150 grams hazelnut meal
75 grams almond meal
1/2 teaspoon baking powder

1.  Cream the butter and the sugar in a mixer.
2. Add the eggs one at a time until full incorporated into the butter/sugar
3. Mix in the flour, hazelnut meal, and almond meal.  it is possible that the dough will still be a little wet, so just add in a little more flour until the dough holds together in a ball.
4. Refrigerate until firm (at least 1 hour).  This dough can be frozen, and used at a later date.


While the Crust is Chilling you can make the Crème d'Amande.
For one 9 inch tarte you will need this:

165 grams butter
165 grams sugar
165 grams Almond Meal
2 eggs (room temperate)
30 grams corn starch
1/2 teaspoon vanilla (or 1/2 a vanilla bean scraped out)
30 ml Goslings Rum (or other dark rum)

1. Cream the butter, sugar, and almond flour.  
2. Add Eggs one at time.
3. add corn starch
4. add vanilla and rum, and mix until fluffy.

This can also be put in the fridge and or frozen until the time you want to use it.

To make the Tarte:

(preheat oven to 375°)

1.  Roll out the crust, and place in tarte ring.
2.  Fill evenly until with the crème d'amandes. (you don't want to fill it all the way up.  about 80%.  There will be displacement!!)
3.  Artfully place the blueberries on top of the crème d'amandes, but do not push them down.  just let them rest on top for now.
4. take the almond slivers and place them around the edge of the taste, on top of the blueberries.  if you desire you may also put them in the middle.  


5. Bake in the oven for 35 minutes, or until the top is nicely golden.  You will notice that the blueberries have sunken into the crème d'amandes,  which is exactly what should happen!


When it cools remove it from the Tarte Ring


And Serve it warm with whipped cream


There is no way this cannot be delicious!

Thursday, November 24, 2011

Jack is Cooking Thanksgiving Dinner!


Well Hello Internet!

I have dug up all the old posts that pertain to Christmas  Thanksgiving Dinner, and i made so many things, that they've been pushed off the main page here.  so i decided to make one conglomerate posting with everything i made!

Heres what Rosie and I made (if you click on the links you will be taken to the individual post):

and


Enjoy, and Happy Christmas Thanksgiving! to Everybody!

Jack

Jack is Cooking Stuffing!


Well Hello Internet!

Another Huge part of any Christmas Thanksgiving! meal, or any meal involving turkey for that matter is the Stuffing.
Stuffing also contains a huge amount of Gluten, so my sister and I set out to make a gluten free stuffing.

We started with a recipe we saw on the food network, and then changed just about everything to make it far more delicious and far more Gluten Free.

Heres what you'll need:

3 cloves garlic
6 tablespoons butter
8 oz pancetta diced
2 large onions chopped
2 carrots peeled and chopped
2 tablespoons chopped Fresh Rosemary
1 large jar of roasted whole peeled chestnuts (coarsely chopped)
1 lb of crusty gluten free baguettes chopped up into little cubes(you can often find these in the frozen section of fancy-ish grocery stores.  but if you are gluten-free you probably know where to get these kinds of things.  Whole foods definitely has it, as do more and more stores these days)
1 cup of chicken/turkey broth
salt and pepper
2 large eggs beaten

First!
take 2 tablepoons of the butter and melt in a pan.  fry up the pancetta until its kinda crispy.

drain all the grease out and put into a bowl

Next,
take the rest of the butter and melt into a pan.  cook the onions, carrots, rosemary, and garlic together until the onions are tender.
stir in the chestnuts.

put everything in the bowl with the pancetta and stir until mixed.
add in the bread chunksand toss to coat.  add the broth until its nice and moist, season with salt and pepper, and then mix in the beaten eggs.

pour into a baking pan

If you are cooking a huge meal (as we were) it is advisable to do this the day before, and refrigerate until the next day when you are ready to cook.

so

next day!

put some of this stuffing inside the turkey!  yum yum

the rest of the stuffing cover with tinfoil and bake at 350 for 30 minutes  then remove the tinfoil and bake another 15 minutes


Heres a tip:  if you are cooking this stuffing as part of a larger meal, remember this takes only 45 minutes to cook, and the turkey takes like 4 hours or something.  so cook this at the end!

in my larger conglomerate post about Christmas  Thanksgiving! Dinner i will talk about the timing of everything!

mmmm mmmm delicious!


Jack is Cooking Turkey!


Well Hello Internet!

Today is thanksgiving so i am going to repost some of my older posts, that are extremely relevant to today!  About now you should definitely have started the turkey already, but in case you are having a last minute panic here are some great recipes!  These recipes originally were for christmas, so they may have a christmas theme, but i've tried to modify them a little bit


So the main event of the Christmas Thanksgiving! Dinner : Turkey!  well almost the main event, there is ham also.

But anyways, the Turkey!  this is actually pretty easy and almost impossible to screw up.
you can put whatever herbs and spices you want on it, but we had a heritage breed turkey, and honestly its so darn good that it doesn't need anything except butter and stuffing!

So we took the turkey, and i put some of the delicious pancetta chestnut stuffing and i stuffed it in both ends.  then i took a whole lot of butter and rubbed it all over the turkey.


so somebody might notice that my turkey might be upside down.  however, i think its right side up.  and thats  because the skin on the breast is delicious, and if its in the bottom of the pan it gets soggy.  this way it gets really nice and crispy.  so BREAST UP!

after you've covered it in butter, put maybe an inch of water in the pan.  this is important.  very very important!  its the key to moist turkey!  then put tin foil over the whole thing.  but try to have it not touch the turkey.  imagine almost a tent of tinfoil.   this will contain some of the steam from the water, but let some out too.

Then roast it at 350 for about 20 minutes per pound, or until the internal temperature reaches 175°.  for our turkey it took 4.5 hours.  when there is going to be about 45 minutes to an hour left cooking, REMOVE THE TINFOIL  this will allow the skin to get crispy!


  take it out and let it sit for another 30 minutes to an hour
 it will eventually get to 180°

then get your carving tools out and carve away!  Save the pan and the drippings to make Gravy

mmmm mmmm delicious

Wednesday, September 21, 2011

Jack is Cooking Tofu with Cashew Nuts

Well Hello Internet!

Today i have a Thai recipe to share.  You may recall seeing this at your local Thai establishment as Chicken with Cashew Nuts.  Its pretty good with chicken, but i find it much easier to keep Tofu in my fridge, as it has quite a longer shelf life.  It's a pretty good substitute if you fry it up first.  Feel free to use chicken if you want for the original version.

Here's what you'll need to make it the tofu way:

Half a Block of Tofu (cubed, and fried until golden and crispy)
2 tbspns of Cashew nuts (lightly fried)
1/2 an onion (sliced in moon slivers)
2-3 dried red chillies
2 cloves garlic
cherry tomatoes  (optional)
spring onion (optional garnish)

for the sauce:
1 tbspn oyster sauce
1/2 tbspn soy sauce
1/2 tbspn fish sauce
1/2 tbspn ketchup
1/2 tbspn chilli sauce
a couple of drops black soy sauce
1/2 tspn sugar
1/2 teaspoon black pepper

1.  heat some oil in a pan, and add the garlic and red chillies.  When the garlic begins to brown a little add in the tofu.  (if you are going to use chicken, this is when to add the raw chicken,  cook it until it is cooked  90% through)

2.  add the onions, cherry tomatoes, and cashews

Onions, Tofu and Cashew Nuts
3. while the onions are cooking, mix all the sauce ingredients together:

Sauce
4.  Add the sauce to the pan, with a little water.  Stir and fry to mix together.

Veggies, Sauced
5. Serve with Rice, and garnish with green onions if you have them!

Tofu and Cashew Nuts with Rice
And That's it!  a super easy thai dish to make, with very little ingredients.

mmmm mmmm delicious

Saturday, September 10, 2011

Jack is Cooking a Documentary!

Well Hello Internet!

As some of you know, when i am not cooking i am taking photos and making movies!  for the last year i have been working on a documentary about the Q'ero people of peru.  The time has come to ask for some support so i set up an Indiegogo project.  i have put it in the side bar so that if anybody wants to they can watch the trailer for the movie, and make a donation!  anybody who does so will get all sorts of cool stuff ranging from DVD of the finished movie, to super awesome hand made Peruvian Textiles!

for the purposes of this post i have put it here also:


Thanks everybody
Jack

Sunday, August 28, 2011

Jack is Cooking Hurricane Curry

Well Hello Internet!

Last night as Hurricane Irene bore down upon new york city, we hunkered down and made some curry!  It was the perfect thing to eat while eagerly waiting for the storm.

Otherwise known as a Navratan Korma, this was my own twist on a delicious creamy vegetable curry.
as always with my curry recipes i will divide the spices into groups depending on when they need to be added.  This particular curry has lots of separate steps to take in order to prepare your mis-en-place, but otherwise the actual steps taken are quite simple.

Heres what you will need:

Spice Group A:
1/2 teaspoon mustard seeds
1/4 teaspoon cumin seeds

Spice Group B
1/2 teaspoon ground turmeric
2 teaspoons ground coriander
1 teaspoon garam masala
1/4 teaspoon cayenne pepper
1/4 + 1/8 teaspoon asafetida
1/2 teaspoon salt

The Rest of the Ingredients:
1 potato cut into 1 cm cubes
2 large carrots sliced
1/2 cup green peas
1 large head of broccoli (with as much stalk as you can get) cubed

1/2 lb paneer (cubed)
2 tomatoes (cubed)
1 onion (grated)
2 cloves of garlic (finely grated)
1.5 inches of ginger (finely grated)
1 can of coconut milk
2 tablespoons ghee
olive oil.

The Preparation:

1.  Prepare your spice bowls.
2. Cut all vegetables to equal sized pieces and parboil them.  these will be cooked more later, so don't overdo it now.  strain and set aside in a colander.
3. Cube the tomatoes, grate the onion, grate the ginger and the garlic.
4. Heat the ghee and 1 tablespoon of olive oil in a pan.  fry the paneer until it is golden brown on all sides.   pour the paneer with ghee and all over the vegetables in the colander.  While its still hot sprinkle some garam masala over them and toss.

Boiled Veggies and Paneer sprinkled with Garam Masala
Now that everything is prepared we can get onto the cooking of the actual curry.
1.  In a medium sized pot, heat some olive oil, and add in Spice Group A.  fry for about 30 seconds, and then add in the onions.  fry these together for about 4-5 minutes.  Add the Ginger and the Garlic, and fry for 30 more seconds.

2.  throw in Spice Group B and fry together for about a minute.  add the chopped tomatoes, and fry for 3-4 more minutes:
Spices and Tomatoes
3.  Add the vegetables and paneer, and toss until they are all nice and coated in the spice-tomato mixture.
4.  Add the can of coconut milk, bring to a boil and simmer until the potatoes are just tender.

simmering curry
Serve with rice, and sprinkle a little cilantro on top for added effect! 
and that's about it!  you can make this during a hurricane no problem, as long as your gas stays on.... or you can make it any other day and its just as good!


mmmm mmmm delicious!


Sunday, August 7, 2011

Jack is Cooking Endives au Jambon

Well Hello Internet!

I was in the store the other day (the kind that sells food), and although it is not endive season the endives looked particularly delicious.  So i thought i would make Endives Au Jambon, which is a classic french dish (i presume) comprised of Endives wrapped in Ham, bathed in béchamel and topped with cheese baked in an oven.  There are two ways to do this - the quickest way to do it is to just blanche the Endives, before wrapping them in ham and baking them.  The Second way is to butter braise them which takes a little longer but is extra especially delicious - in a buttery Julia Child kind of way.  So i suggest the latter.  It's very easy to do, and all you need are endives, ham, cheese, flour, milk, and butter.  oh and some lemon juice.  and some salt and pepper.  and some nutmeg...

Heres exactly what you will need:

5 or 6 Endives (2 per person)
5 or 6 slices of ham (1 per endive)

4 tablespoons of butter
juice of one half lemon
3 tablespoons of flour
2 cups of milk
salt and pepper
a pinch of ground nutmeg
1/4 cup water

1/2 pound gruyere cheese (grated)

You will also need 1 heavy bottomed pot, 1 small pot, and a casserole dish.

The First thing to do is to butter braise the Endives.  To do this we can follow Julia Child's recipe which is this:
(preheat oven to 325°)

Rub 2 tablespoons of butter in the bottom of a heavy pan (like a Creuset).  Take the Endives (which have been washed) and place them in the pan.  I like to rub them around in the pan to get them coated in the butter.  add some salt and pepper, the lemon juice, and the 1/4 cup of water.  Cover the pot and on the stove slowly boil for 10 minutes.
Endives Braising in Butter


After 10 minutes, uncover the pot and turn the heat all the way up and boil for another 10 minutes - until there is only 1 - 2 tablespoons of liquid left in the pot.  At this point take some waxed paper, and put on top of the endives - this will keep them from burning in the oven.  Place them in the oven for 30 minutes.

After about 20 minutes it is time to
make the Bechamel for the next stage.  To make the béchamel place 2 tablespoons of butter in a pan on the stove.  When the butter melts add in 3
tablespoons of flour.  you will have a yellowish paste.  with whisk in hand add the milk in slowly - 1/4 cup at a time - continuously whisking.  You don't want to have any lumps, so make sure that all the lumps disappear before you add the next 1/4 cup of milk.  (NEVER STOP WHISKING!) once all the milk is in, and it has come to a boil you will have a nice thick sauce.  at this point add the salt and pepper, and a generous pinch of nutmeg.

By this point the Endives will be Ready so take them out of the oven.  Turn the oven up to 450°
After Coming out of the Oven

Get your casserole dish out, and pour some of the béchamel into the bottom of it.  (about half).
Next with some tongs, carefully take each Endive and roll it up in a piece of ham
Ready to Roll
After rolling, place each roll into the casserole dish on top of the béchamel sauce.  once you have all of the rolled up Endives in the dish, pour the rest of the béchamel over them and top with the gruyere cheese.

After Cheesing


Place back in the oven at 450° for 30 minutes and cook until the cheese has gone all bubbly and brown.  If you want you can also place it in the broiler at the very end to give the cheese a nice browning.

Here it is after emerging from the oven:

Nice gooey melted Cheese

Close-up


And that's about it!  its good served with a green vegetable of your choice!  i used sautéed mustard greens. 

Thursday, August 4, 2011

Jack is Cooking Mattar Batata... Or something Similar

Well Hello Internet!

as part of my continuing experimentation in learning to cook indian food, i made a tomato based curry with potatoes and green beans.  The Recipe i started with called it Mattar Batata, and was made with potatoes and green peas (Green Peas are called Mattar).  However i didn't have any green peas, and instead i had beans.  So the name Mattar Batata is not really correct and this should really be called something else, probably with the name Aloo in it (Aloo is potatoes).

Anyhow its very easy to make.

Heres what i used in my made up curry based off of Mattar Batata.  As with my other recipes for indian food i will divide the spices into groups, for when they need to be added to the mix.


3 Tbspns Olive Oil

(GROUP A)
1/2 teaspoon mustard seeds
1/4 teaspoon cumin seeds
2 dried red chillies (broken)
1/2 teaspoon asafetida

1 lb Potatoes (cut into one inch cubes)
2 Carrots (diced)
1/2 an onion (diced)
1 clove garlic (diced)

(GROUP B)
1 teaspoon ground cumin
1 teaspoon ground coriander
1/2 teaspoon ground turmeric
1 teaspoon sugar

A Handful of green beans (put your two hands together and however many beans fit in there.  thats how many you need!! )

1 tomato (finely diced)
1 80z can crushed tomatoes

So first!

Organize your Spices into two bowls, and have them ready.

Heat up the oil in a medium sized pot, and add in Spice Group A:
SPICE GROUP A
 Cook for about 10 seconds, and then add in the onions, garlic, and carrots.  stir and cook until the onions are a little wilted, and then add the potatoes.  fry the potatoes until they start going brown.  don't worry if they are sticking, let them stick.  This will add to the flavor!

Once the Potatoes are browned add in Spice Group B:

SPICE GROUP B
Stir them together and then add half a cup of water (it won't cover it completely).  Bring to a boil and boil for about 10 minutes (or until the potatoes are soft).  The water will mostly boil off at this point, but some should remain.


At this point you can add in the beans, the tomato, and the crushed tomatoes, and simmer for a further 5-7 minutes - or until the beans are tender, but still a little crunchy (As good beans should be!)

Everything in the Pot
and that's it!  Serve it with some Rice.


YUMM!

Saturday, July 23, 2011

Jack is Cooking Peach and Berry Pie

Well Hello Internet!

Since yesterday was the hottest day of the year (i think it got up to 108°  -  which as a LOST fan obviously holds some special significance...)  I decided that i should turn my oven on to 400° and make a pie.  An extremely Delicious, gooey, oozing pie filled with very delicious Ingredients.

it all started because i found a Peach in my fridge.  Peaches are my absolute favorite fruit, and after eating it for breakfast, i just had to have more.  I hadn't baked anything in a while, so i figured i would make a pie.  but that's not all i found in the fridge, there were a few blackberries also!  This got my mind gears moving and i decided that i would make a Peach and Blackberry Pie.

However, since I had eaten all of the peaches and blackberries in my fridge I would have to go buy more.  So I braved the heat, and walked to Union Square market to buy some more Peaches.  Upon arriving I encountered more berries than I could walk away from, and so along with the Peaches and Blackberries i had set out for, i returned home with blueberries and gooseberries.  (GOOSEBERRIES!)

Delicious Fruit


and Baking Ensued!

Here's what you will need to make this pie - and you should definitely make this pie.

for the Crust (Pâte Brisée)- from Julia Child:
2 cups A/P flour
1 tsp Salt
1/4 tsp Sugar
1 and 1/2 stick (6 oz) chilled butter - cut into small cubes
4 tbspns chilled vegetable shortening
1/2 cup of iced water

For the Filling:
7 or 8 Peaches
8 oz blackberries
8 oz blueberries
8 oz gooseberries (stemmed)
1/4 cup white sugar
1/4 cup brown sugar
1/4 cup flour
1 tbspn corn starch
2 tsp vanilla extract
the inside of 1/2 a vanilla bean (optional, but steps it up a notch)
3 tbspns Rum

For the Crumble
1/2 tspn cinnamon
1/4 tspn nutmeg
3/4 cup granola
1/4 cup sliced almonds
1 cup flour
1/2 cup brown sugar
1/2 cup Cold Butter

preheat oven to 400°

To make the Crust
Put all the ingredients except the water into a bowl, and cut the butter and shortening into the flour until it resembles a texture similar to oatmeal.  don't overmix the butter in, just get it to this crumble state.  (later i will do a post purely on Pie Crusts)

Add half of the water in, and mix until it just comes together.  if it is still very dry slowly add a little bit more water, but depending on the humidity of the day you will use more or less water.  (since it was VERY humid yesterday i used very little water at all)

once the dough has come together in a flaky ball, take walnut sized pieces smear them with the heel of your hand against the counter.  this will finish the mixing of the butter and the shortening.  gather all the dough together and wrap it up and chill is for an hour.

Next! prepare the fruit!

Peel and slice the peaches (this is a tedious, messy operation), put them in a bowl with the rest of the fruit, and add all the rest of the ingredients, and mix it up gently, as you don't want to destroy the lucious berries.
the fruit!

Now, since that probably took about an hour, take the chilled dough out of the fridge and roll it out on a floured board, and place it into your pie container.  Add the filling to it.  don't worry if its overflowing a little bit.  LET IT OVERFLOW!

put this in the fridge while you make the crumble.

to make the crumble (this ones easy!):
add all ingredients together in a bowl and mix (with your hands!!!!) until crumbly.
put it over the filling
before baking
(as you can see i actually made two.... but the ingredients listed here are only for one!)

place it on a tray and cook it first for 20 minutes uncovered.  then cover with tinfoil and bake it for another 25 minutes.  finally remove the tinfoil and bake it for a further 15 minutes.  Remove from the oven and let it cool for 30 minutes.

and then:

yummmmm

and then
want to eat
 and then
must. wait. 30. minutes 
and then yes you can eat it, and just look how delicious and gooey and sticky and scrumptious this is...
and save some for somebody else!


mmmmmm........

Friday, July 22, 2011

Jack is Cooking Saag Paneer

Well Hello Internet!

Another dish i have been making quite a bit recently is Saag Paneer.  This is an Indian dish most commonly made with spinach, but can also be made with a variety of other Greens.   I have experimented with many of these greens, but have to say that my favorite is to make it with a mixture of Kale, and Spinach.

Here is what you will need:

1 Bunch of spinach - (at least 250-300 grams)  cut up into large pieces
1 bunch of Kale - (250-300 grams)  - cut up into medium sized pieces
150 Grams Paneer (Indian Cheese) cut into 1 inch cubes -  This will not really work with any other type of cheese, except maybe fresh Queso Blanco

2 tbspns Oil
1 tbspn Ghee
1/4 tspn cumin seeds
1/2 tspn mustard seeds
2 cloves garlic (grated)
1 tsp coriander
1/2 tsp ground ginger
1/4 tsp nutmeg
1 inch Fresh Ginger - Grated
1/2 tsp salt
1/4 tsp sugar
1 tsp Garam Masala
100 ml milk (OPTION:  when i first started making this i used Heavy Cream.  but i don't always have it (and its very rich), so sometimes i will use milk, or Almond Milk)

So this dish is very easy once you get the hang of it, but it requires very good Mis-en-Place.  which means have everything ready and organized before you start cooking as it all happens very fast, and there are lots of spices!  it helps if you use some ramekins, or some other little bowls.

Here is how to best organize yourself:

1. In one bowl, put the cumin and mustard seeds, along with the grated garlic.
Mustard Seeds (L) & Cumin Seeds (R)


2.  In a second bowl, put the coriander powder, the ground ginger, and the nutmeg.


3.  In a third bowl, put the sugar, the salt, and the grated FRESH ginger.

ok so that's enough organizing.  

now for the cooking.  First! heat up the ghee in a pan, and add the paneer to it.  fry the paneer until it is nicely browned on all sides.  it can burn quickly so don't let that happen.  once its finished cooking, strain it and put it aside in a bowl.  sprinkle the Garam Masala over the paneer while it is nice and hot.

Garam Masala
Second!  with the leftover ghee that should still be in the pan from the paneer, cook the spinach and the kale, until it is just wilted.  this will not take very long.  put all of this into a colander and let it sit.

Now is time to cook the spices.  and where all our organizing comes into play.

put the 2 tbspns of oil into the pan and heat it up.  throw the first bowl in (the cumin and mustard seeds, with the garlic)  cook it for about 10 seconds, or until the seeds start sputtering.  Then!  throw the Second bowl in - the ground coriander, ginger and nutmeg.  and cook that for about 10 seconds also.  you will have a spice goop that is very hot now.

quickly throw the cooked greens back into the spices, and toss around until the spices are even spread around.  cook this for about 2 or 3 minutes.   Then add the cooked Paneer, along with the Third bowl - with the sugar, the salt, and the FRESH ginger.  cook all this for about 2 or 3 minutes, and Finally add in the milk (or Cream, or Almond milk, whichever route you choose to go)  cook for a further 2 minutes, and then its done!


Serve it with some rice, and if you want you can serve it with some other curry!  (soon i will put up more curries, as i've been on a bit of a Currinary adventure recently.....  (get it curry + culinary)  ;-)


YUM!


Wednesday, July 20, 2011

Jack is Cooking Some Kind of Beef Noodles (take II)

Well Hello Internet!

its been a long time.  almost a year since my last post!  don't worry i've still been eating cooking a lot!  but i've mainly been playing with old recipes and so didn't think i should post the same thing twice.  but since i've got this here website i figured i should probably start posting on it again!

So One dish that was really awesome that i made a while ago, (and took a picture of!) was this awesome beef noodle soup dish that i found in a magazine (Saveur).  I didn't exactly make what the recipe in the magazine said, i made my own thing out of it.

So here's what you'll need:

1 lb of beef - doesn't matter what cut, but its nice if it has bones in it.  i used a T-Bone steak, (which i am sorry to say had been in my freezer for too long, and had gotten a bit of Freezer burn on it.  it wouldn't have been good as a plain steak, but was perfect for this soup)

GROUP A
1/4 cup sake
2 teaspoons mixed pepper corns
2 cloves of garlic (smashed)
1/2 can crushed tomatoes
1 pod star anise
1/2 onion
2 dried red chillies
a bunch of ginger (like 2 inches)

GROUP B
1 teaspoon vinegar,
1  teaspoon soy sauce
1 teaspoon salt
1 teaspoon sugar
1/2 tablespoon sesame oil

GROUP C
fresh spinach
fresh egg noodles - the really thin kind!
a green onion
sesame seeds

So First, cut up the steak into random sized chunks, and throw all the meat and the bones into a pot of water.  bring this to a boil, and then drain the water.  take the beef and the bones and put it back in the pot with everything from the list in Group A.  cover this with water, and bring it back to a boil.  let it simmer for about an hour.

Then! after one hour, remove the beef from this stock and set it aside on a cutting board.  strain the liquid  so that you have a nice broth, and discard all the onions and ginger pieces, and whatever else may have been in the stock.  Cut the Beef into nice bite sized pieces.  you can now get rid of the bones, as their delicious goodness has been transferred into the stock.

Add everything from GROUP B (the soy sauce etc.) into the broth, and add the newly bite sized beef back into the broth.

In a separate pot, cook the noodles for their specified cooking time.  if they are fresh that will only be 2 minutes or so.  remove the noodles, and place them in the serving bowls.  SAVE THE WATER!
then cook (BLANCHE!) the spinach in the water.  remove the spinach from the water and put it into the bowls with the noodles.

Then take a Ladle, and ladle the nice broth over the noodles and spinach, making sure to get the good beef stuff into the bowls too.  garnish it with some Green Onions, and Sesame Seeds, and you have a Delicious Beef Noodle Soup Dish!

Heres what it looked like, PLUS the original picture from the magazine.

mmm mmm delicious!

P.S.   the original recipe which i adapted this from can be found here:
http://www.saveur.com/article/Recipes/Hong-Shao-Niu-Rou-Mian-Taiwanese-Beef-Noodle-Soup